Are you looking for a simple way to build a checkout form you can embed or share directly? With Tally’s payment forms and calculator, you can easily create a checkout form with shopping baskets, apply discounts, automatically update shipping costs, and more.
You can build checkout forms with Tally for free with a 5% commission fee. To remove the charges, upgrade to Tally Pro.
How it worksCreate a formInsert calculated fieldsInsert conditional logicMention the priceCreate checkout pageApply a discountInsert a payment formAdd a Thank you pageCustomize your form Share or embed your checkout form
How it works
Creating a simple checkout flow with Tally is similar to building any other form. You'll need calculated fields to automatically calculate pricing for your products or services and a payment block to process payments.
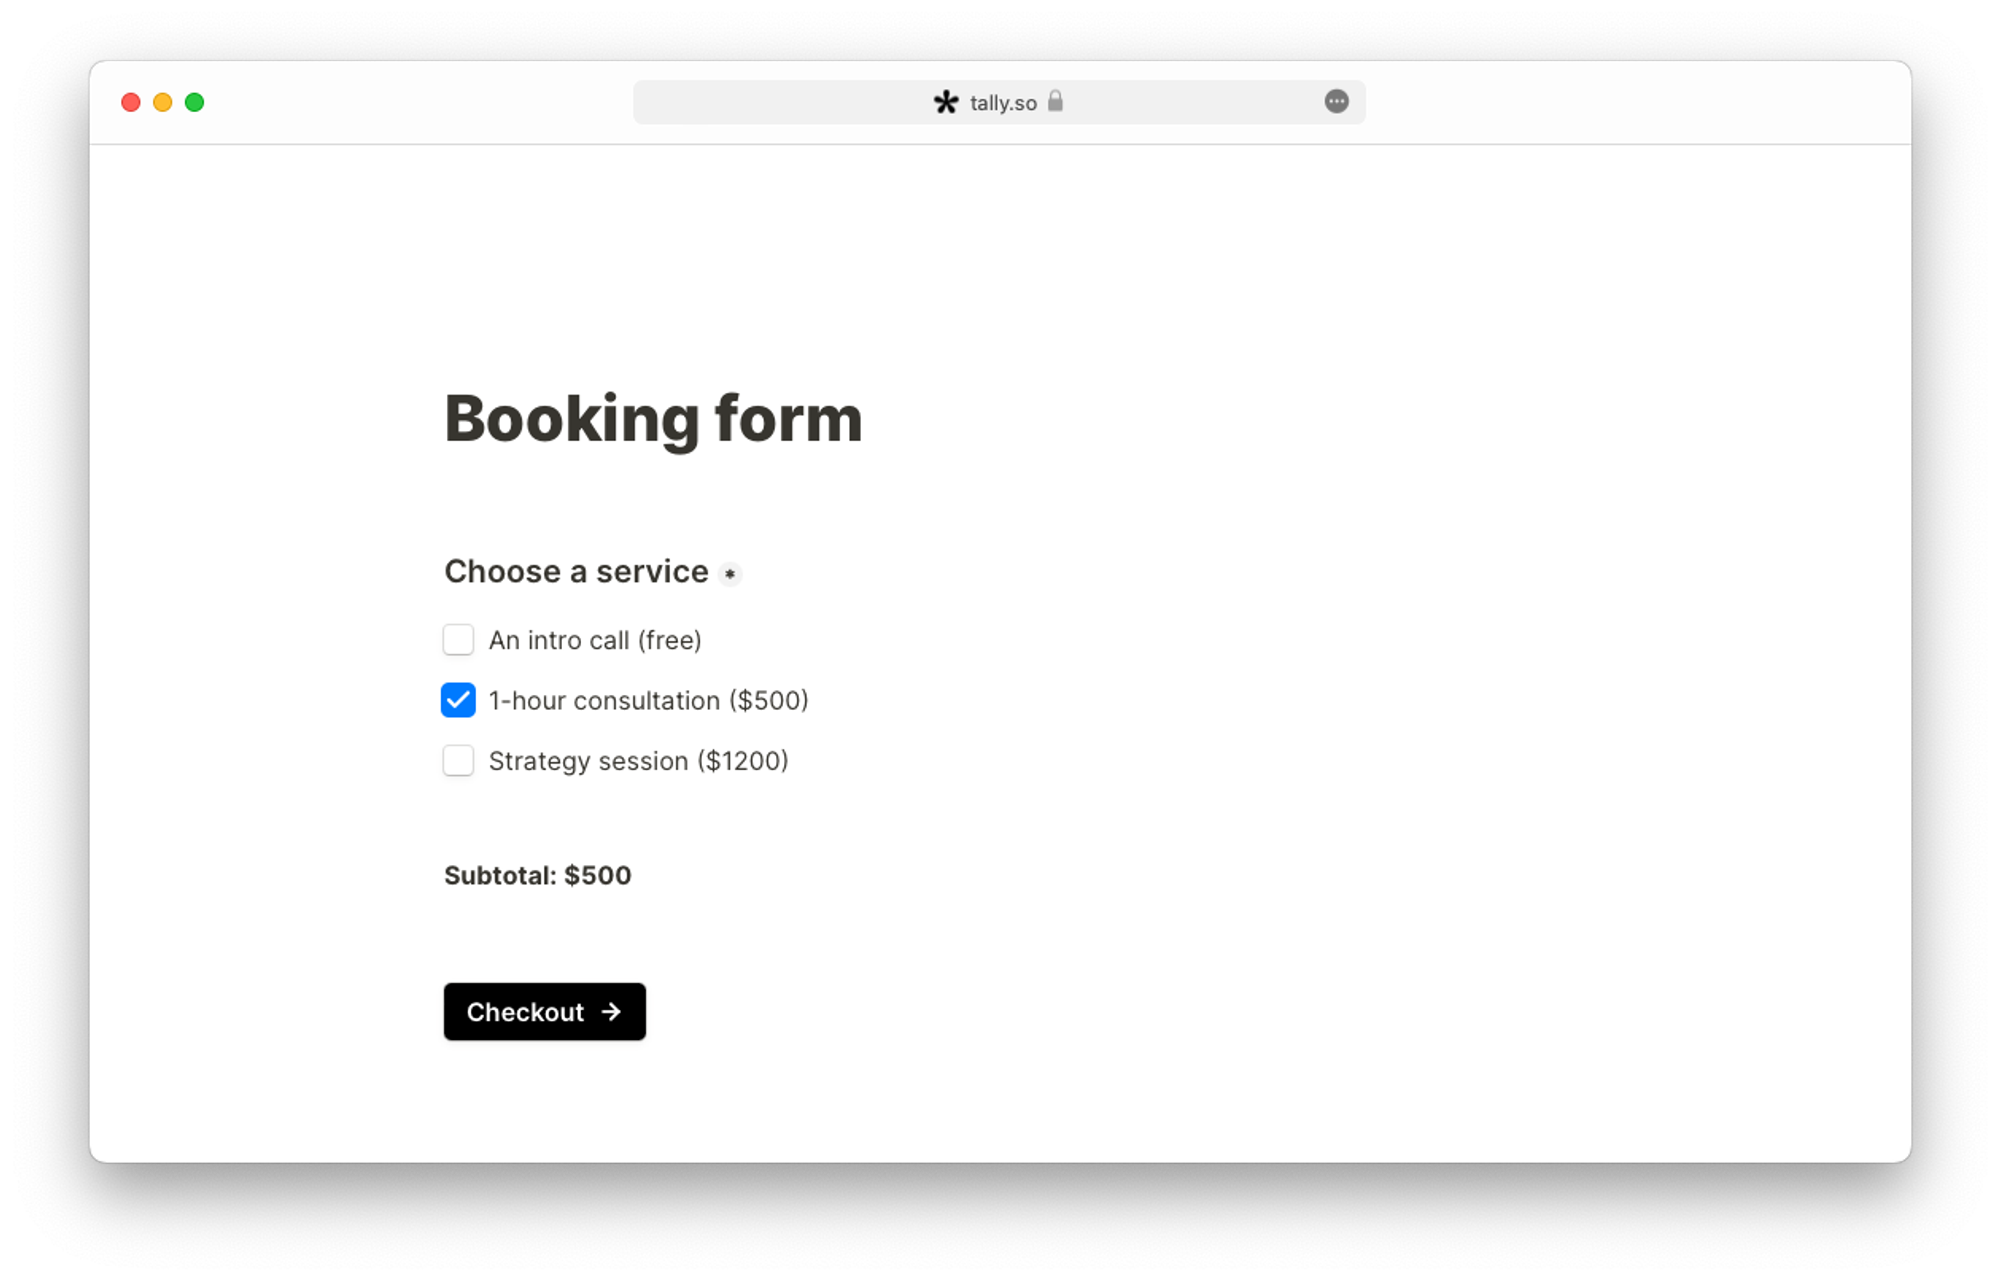
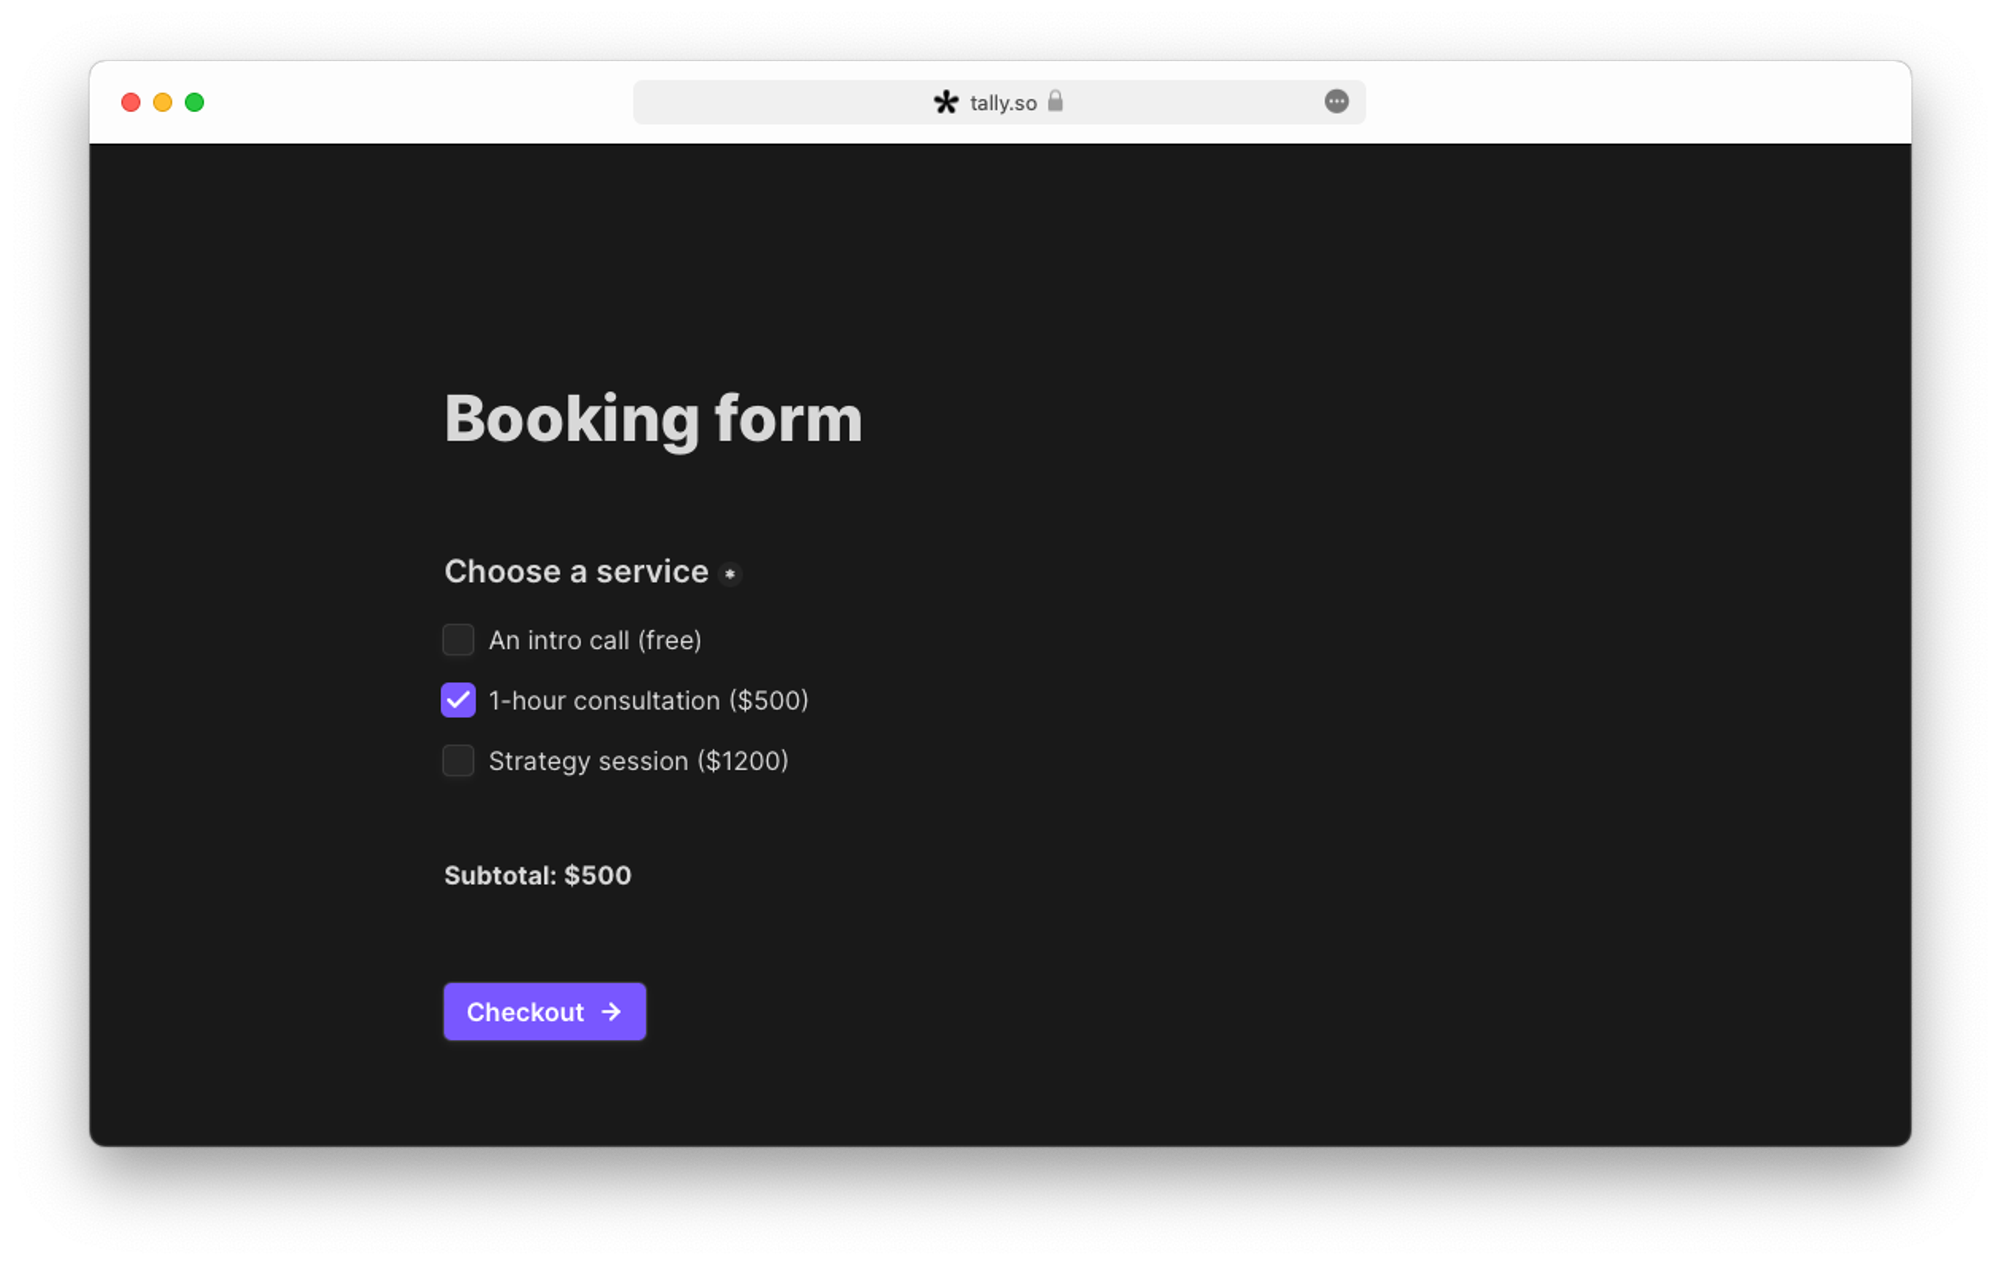
This example shows a checkout flow for booking services. Based on the respondent’s selected options, the payment form automatically updates with the correct total at checkout.
Follow the steps below to set up your own custom checkout form.
You can get started with this free template. Or for a more advanced checkout flow with a multi-product order, take a look at this template.
Create a form
First, create a new Tally form and add a question block that offers choices and lists your available products or services. In the example above, we used a checkbox, but you can use other question blocks, such as dropdown or multiple choice.
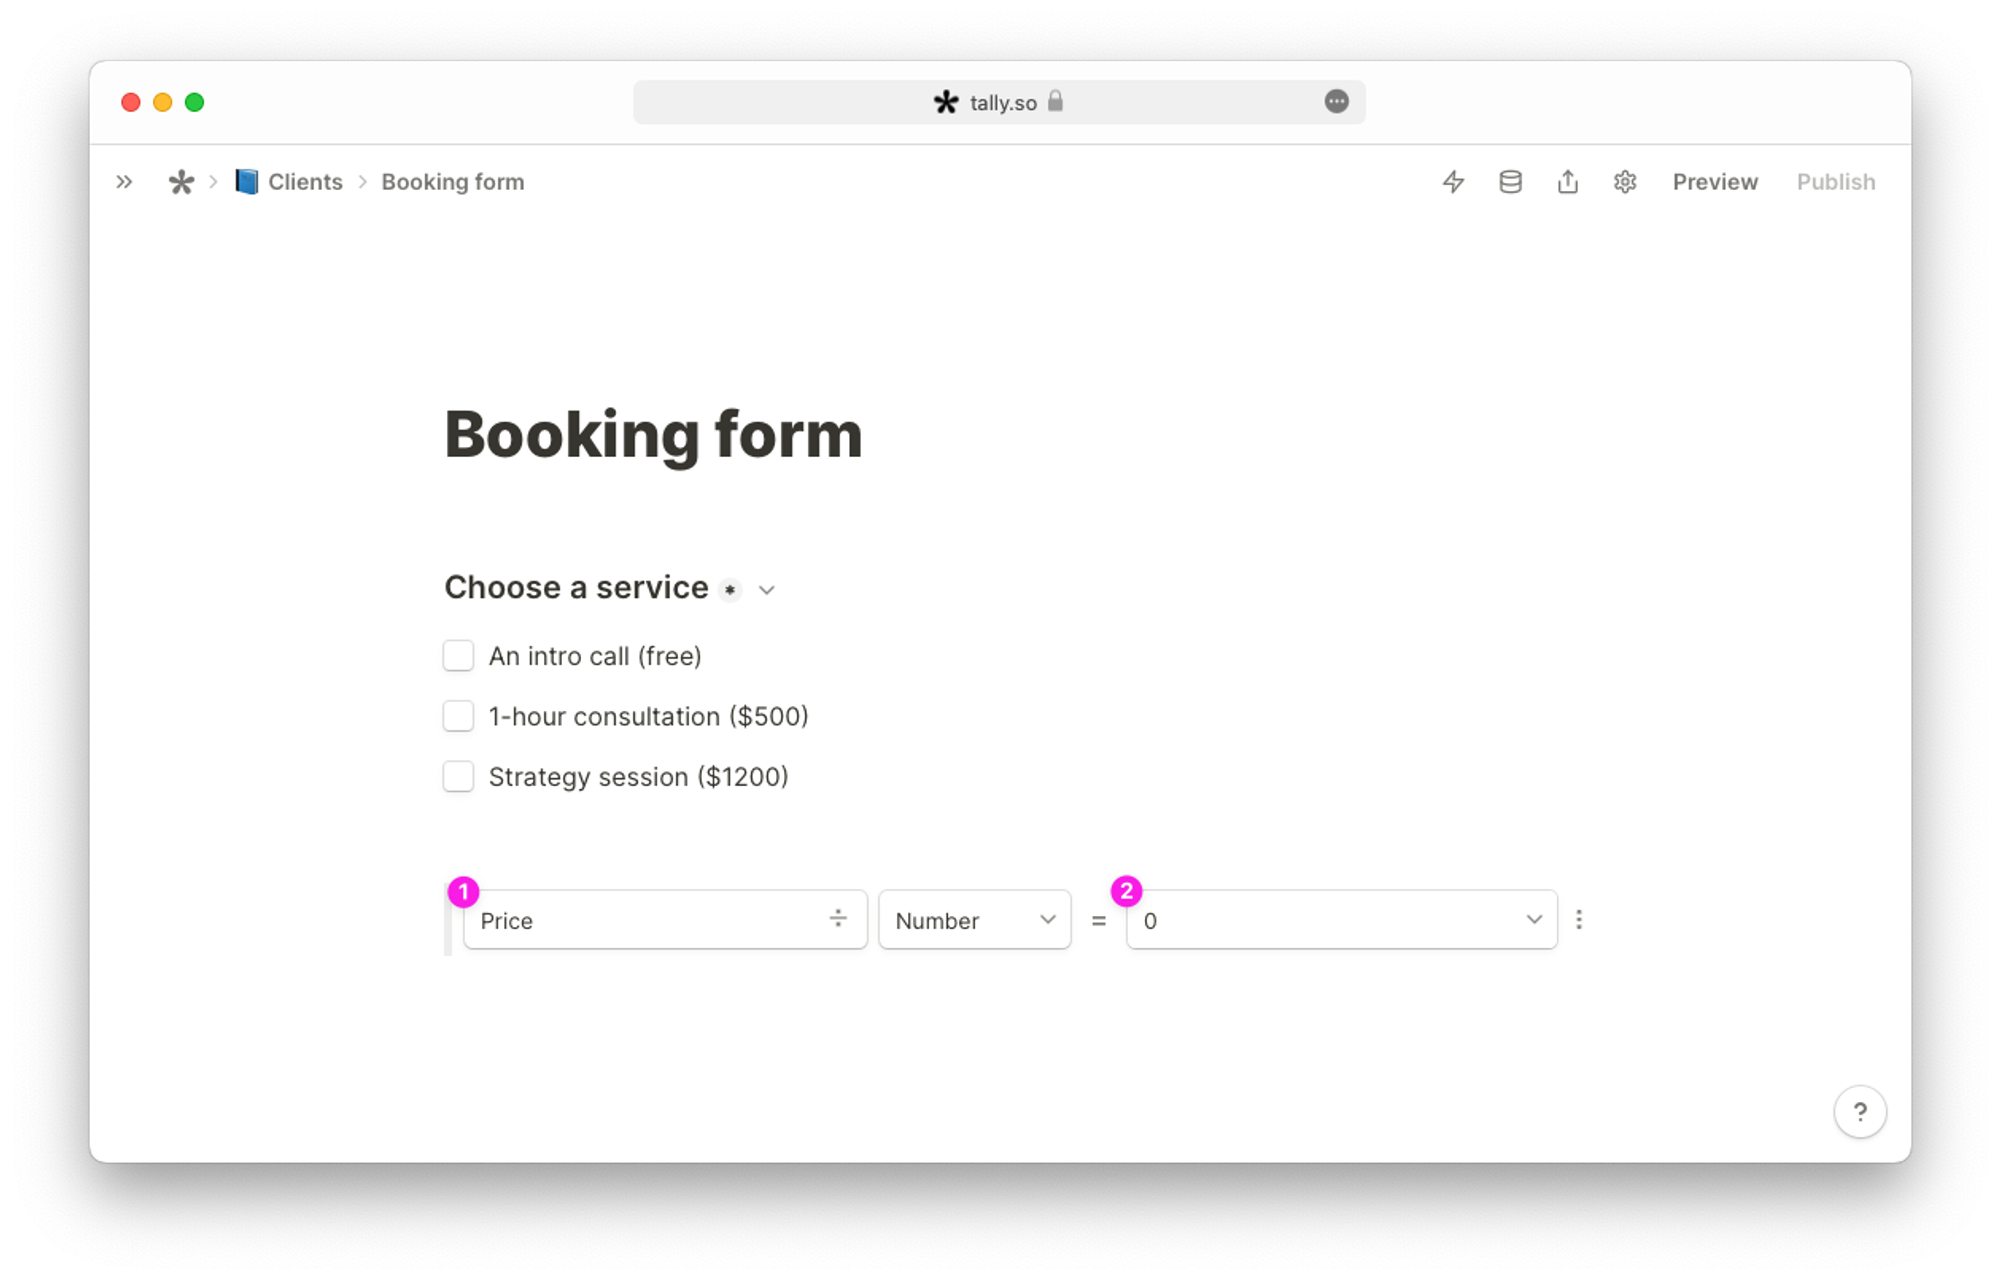
Insert calculated fields
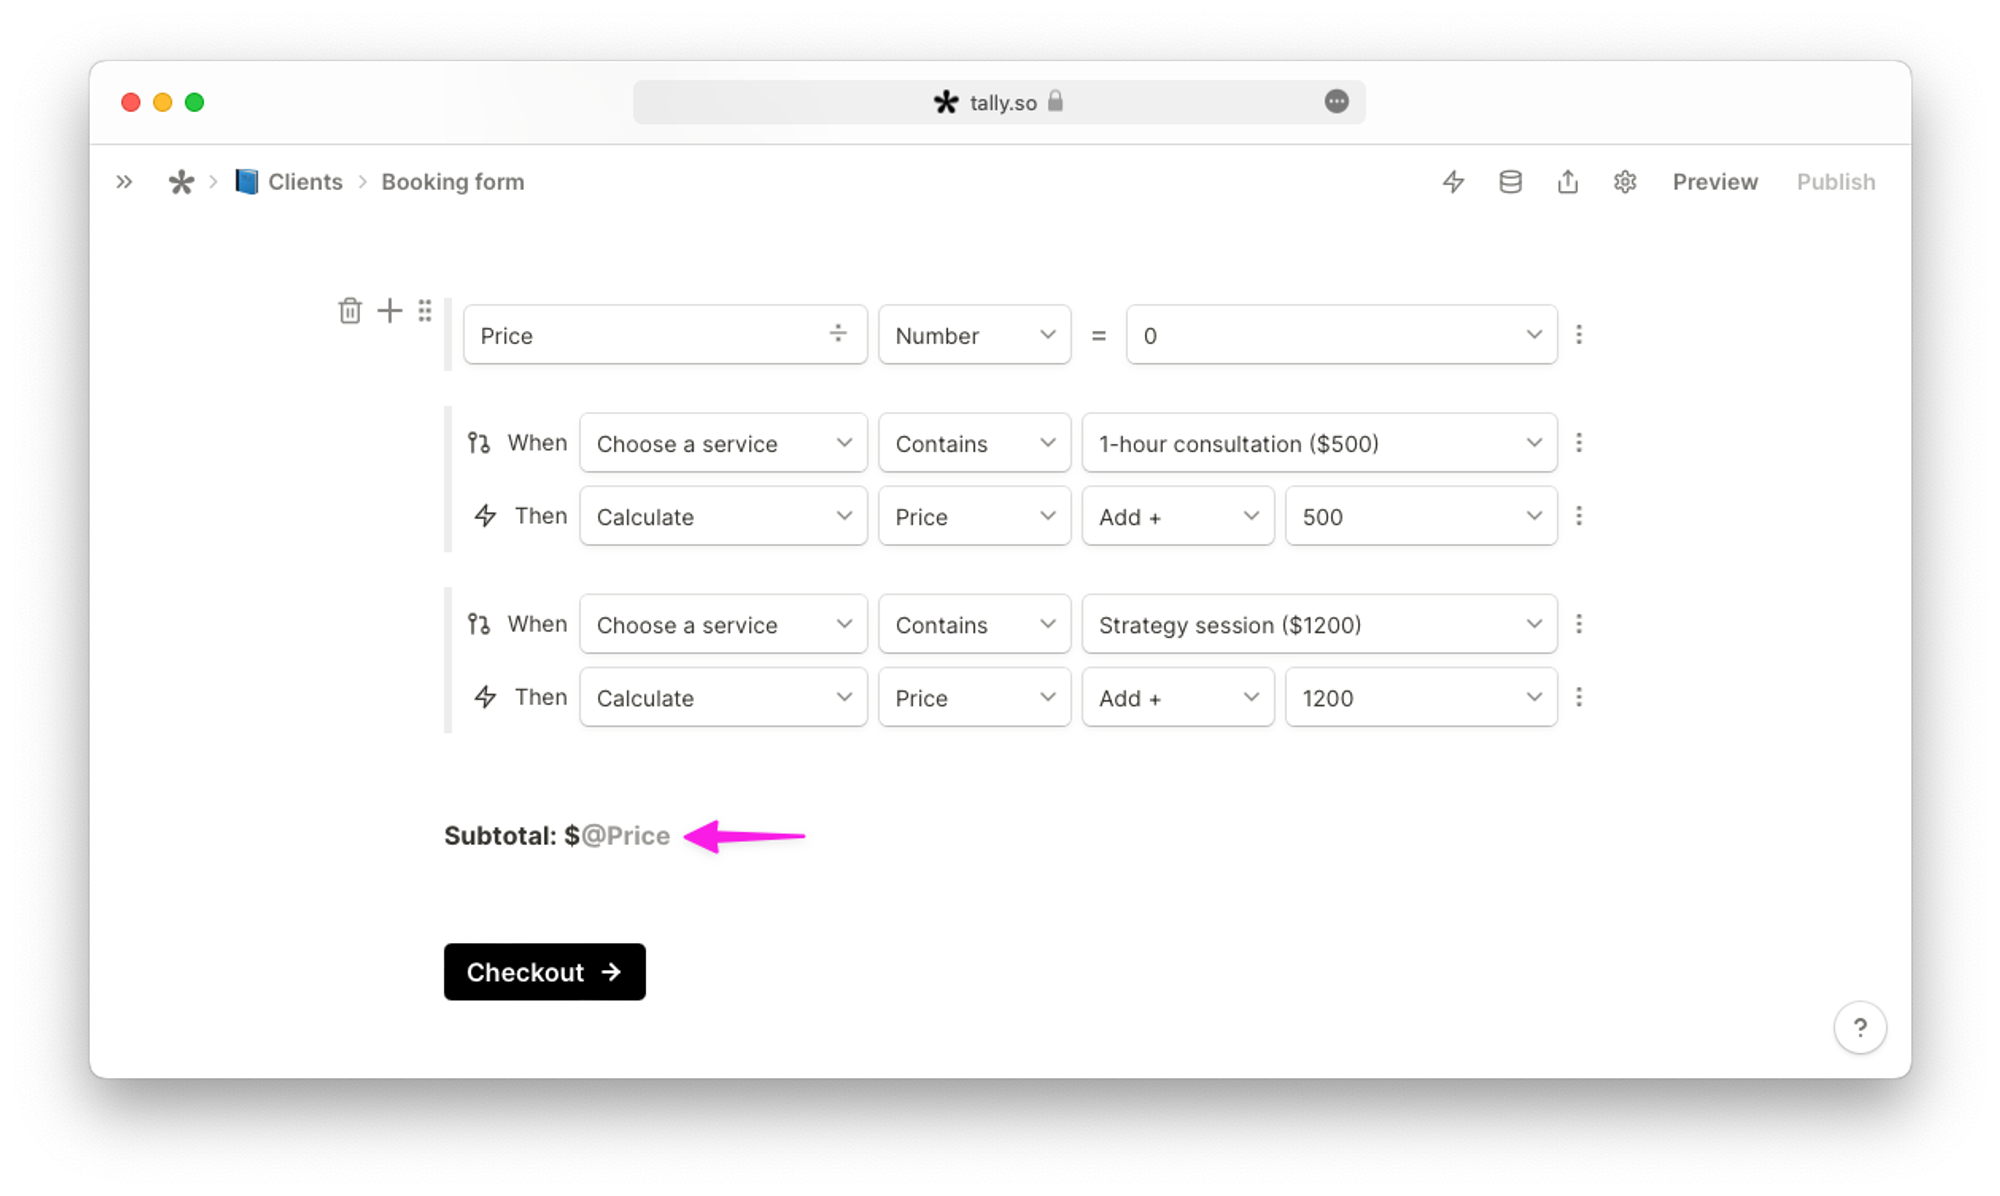
Below your products or services blocks, insert a calculated field and name it (for example ‘Price'). Then, add an initial value as a starting point of your calculation (in this case, '0').
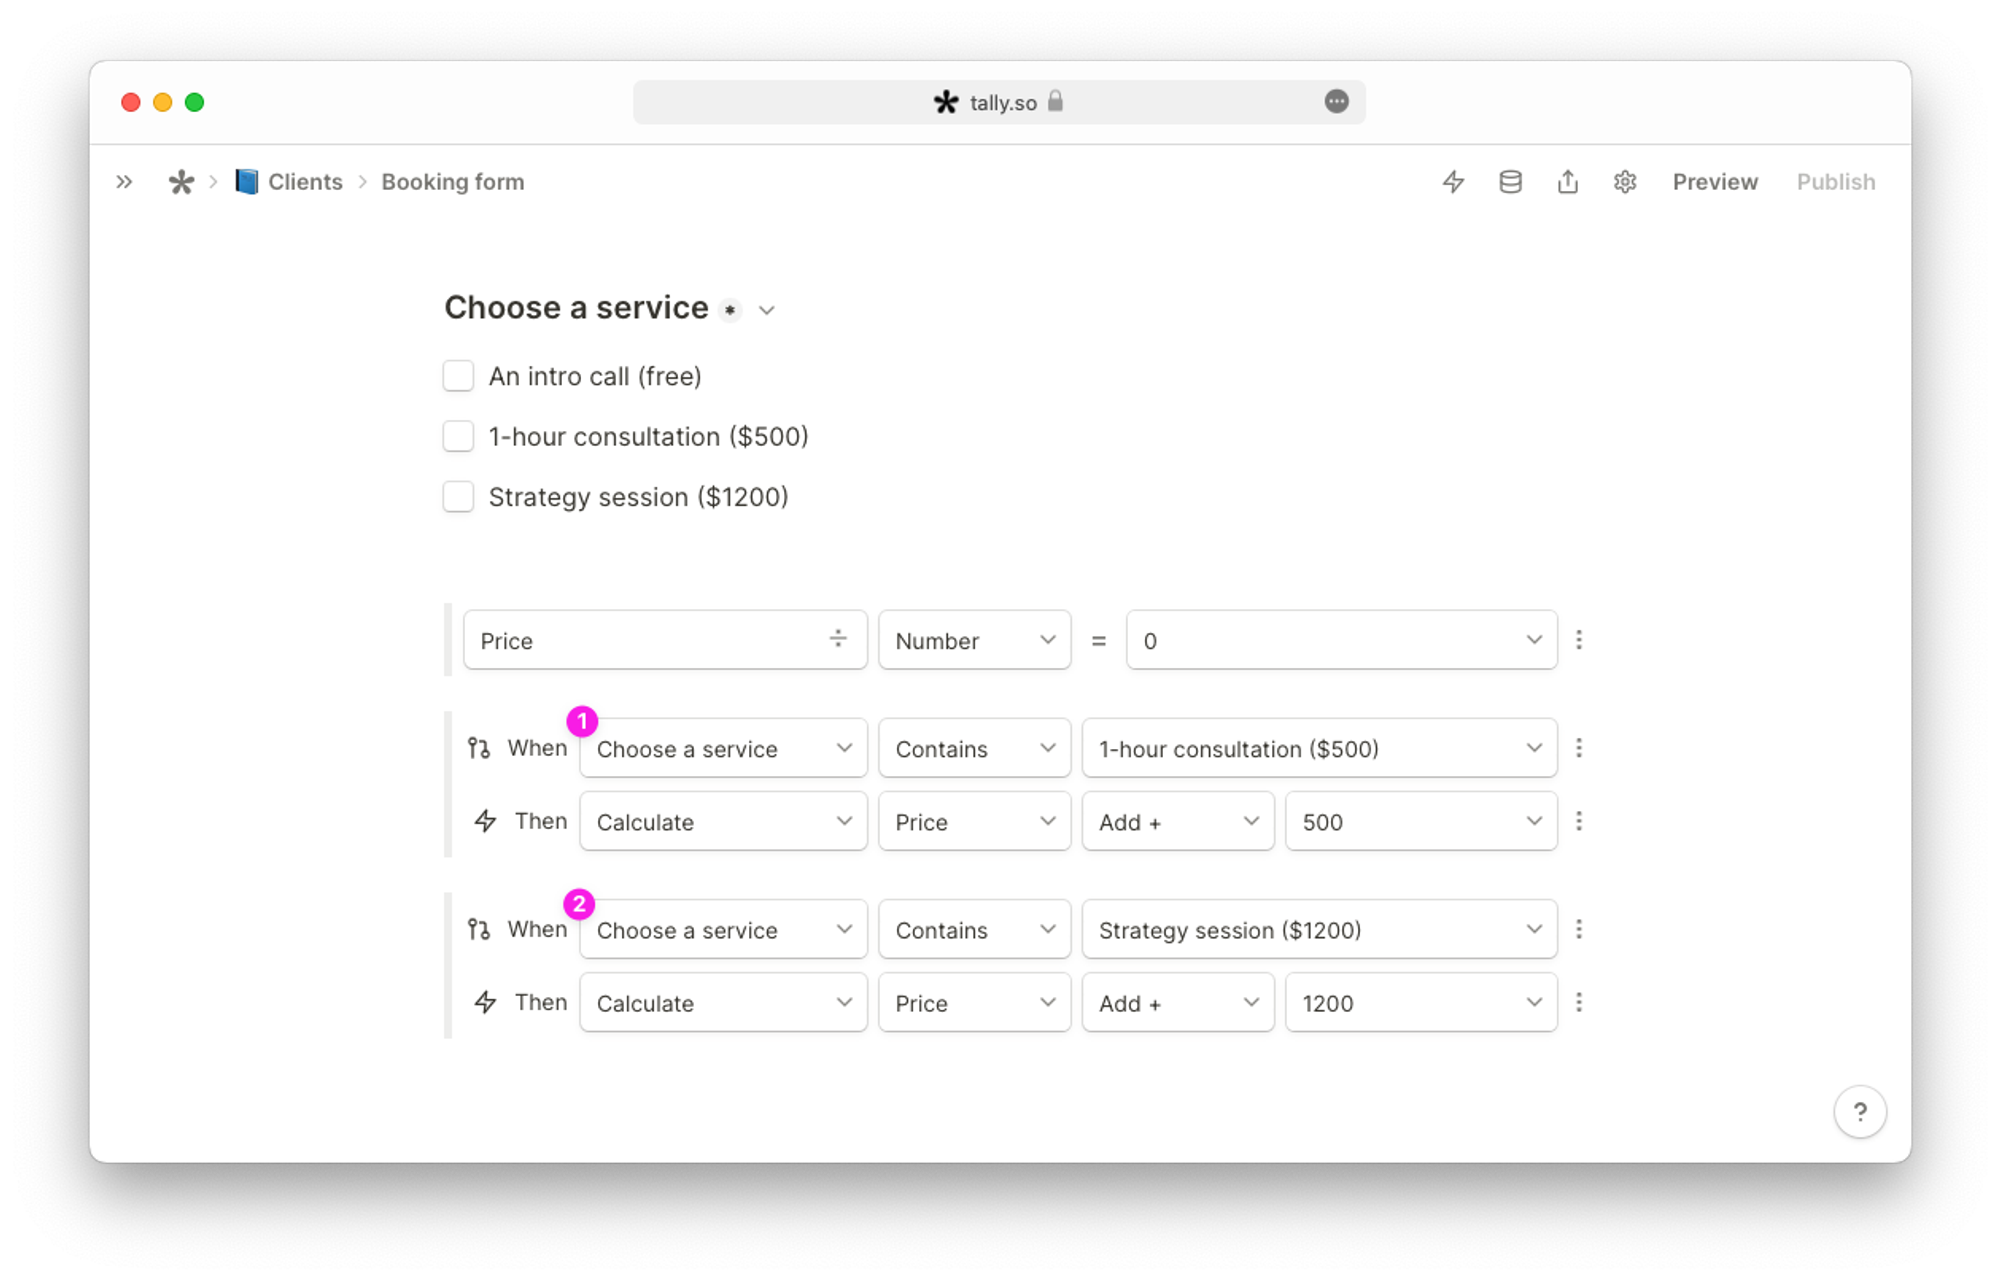
Insert conditional logic
To continue, insert two conditional logic blocks to create your price calculation:
- When your respondent chooses 1-hour consultation add 500 to your calculated price field.
- When your respondent chooses strategy session, add 1200 to your calculated price field.
Mention the price
If you want to mention in your calculated price field as a subtotal, just type '@' and choose your calculated field from the dropdown. Make sure to add the currency symbol before the mention.
Create checkout page
Once you’re done setting up your products or services page, you can add a new page for the checkout. Simply type
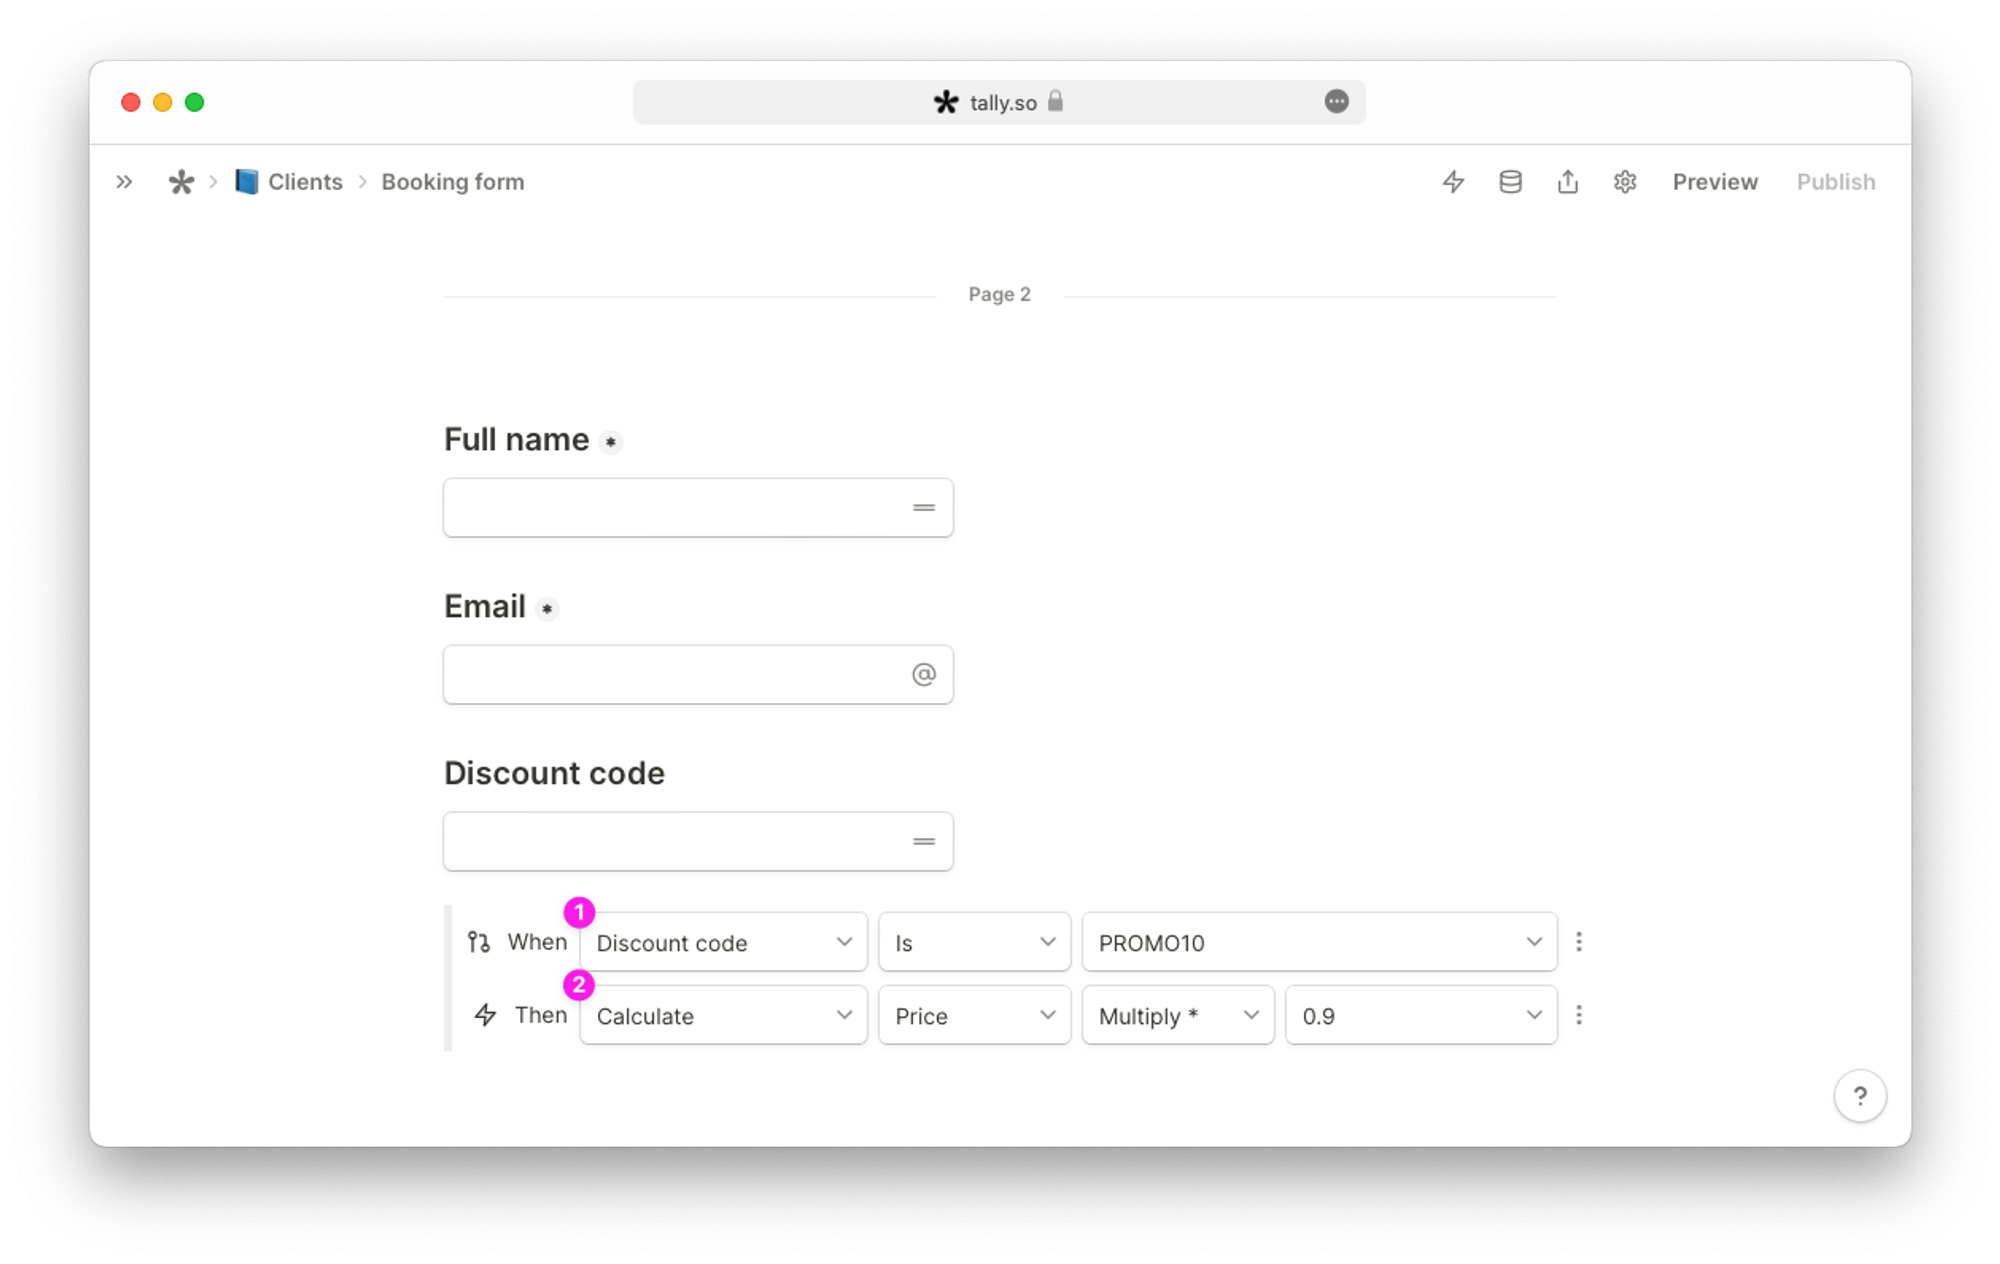
/new below the calculated price fields and select New page. Here, you can add any fields necessary to collect information about your customers, such as their name and email address.
Apply a discount
To create a discount code, decide on a code customers will need to enter, such as ‘PROMO10’, which gives a 10% discount in our example. Note, the code is not case-sensitive.
Then, add an additional conditional logic block and multiply your calculated price field with 0.9 when your respondent enters the correct discount code.
To calculate other discount percentages:
- Determine the discount percentage (such as 25% off)
- Convert to decimal by dividing by 100 (25/100 = 0.25)
- Subtract that decimal from 1 (1 - 0.25 = 0.75)
- The result (0.75) is the multiplier to add in the
Multiplyfield
If you add a discount code field, make sure it’s not a required field. Otherwise, users won’t be able to continue to the next page unless they add a code in the discount field.
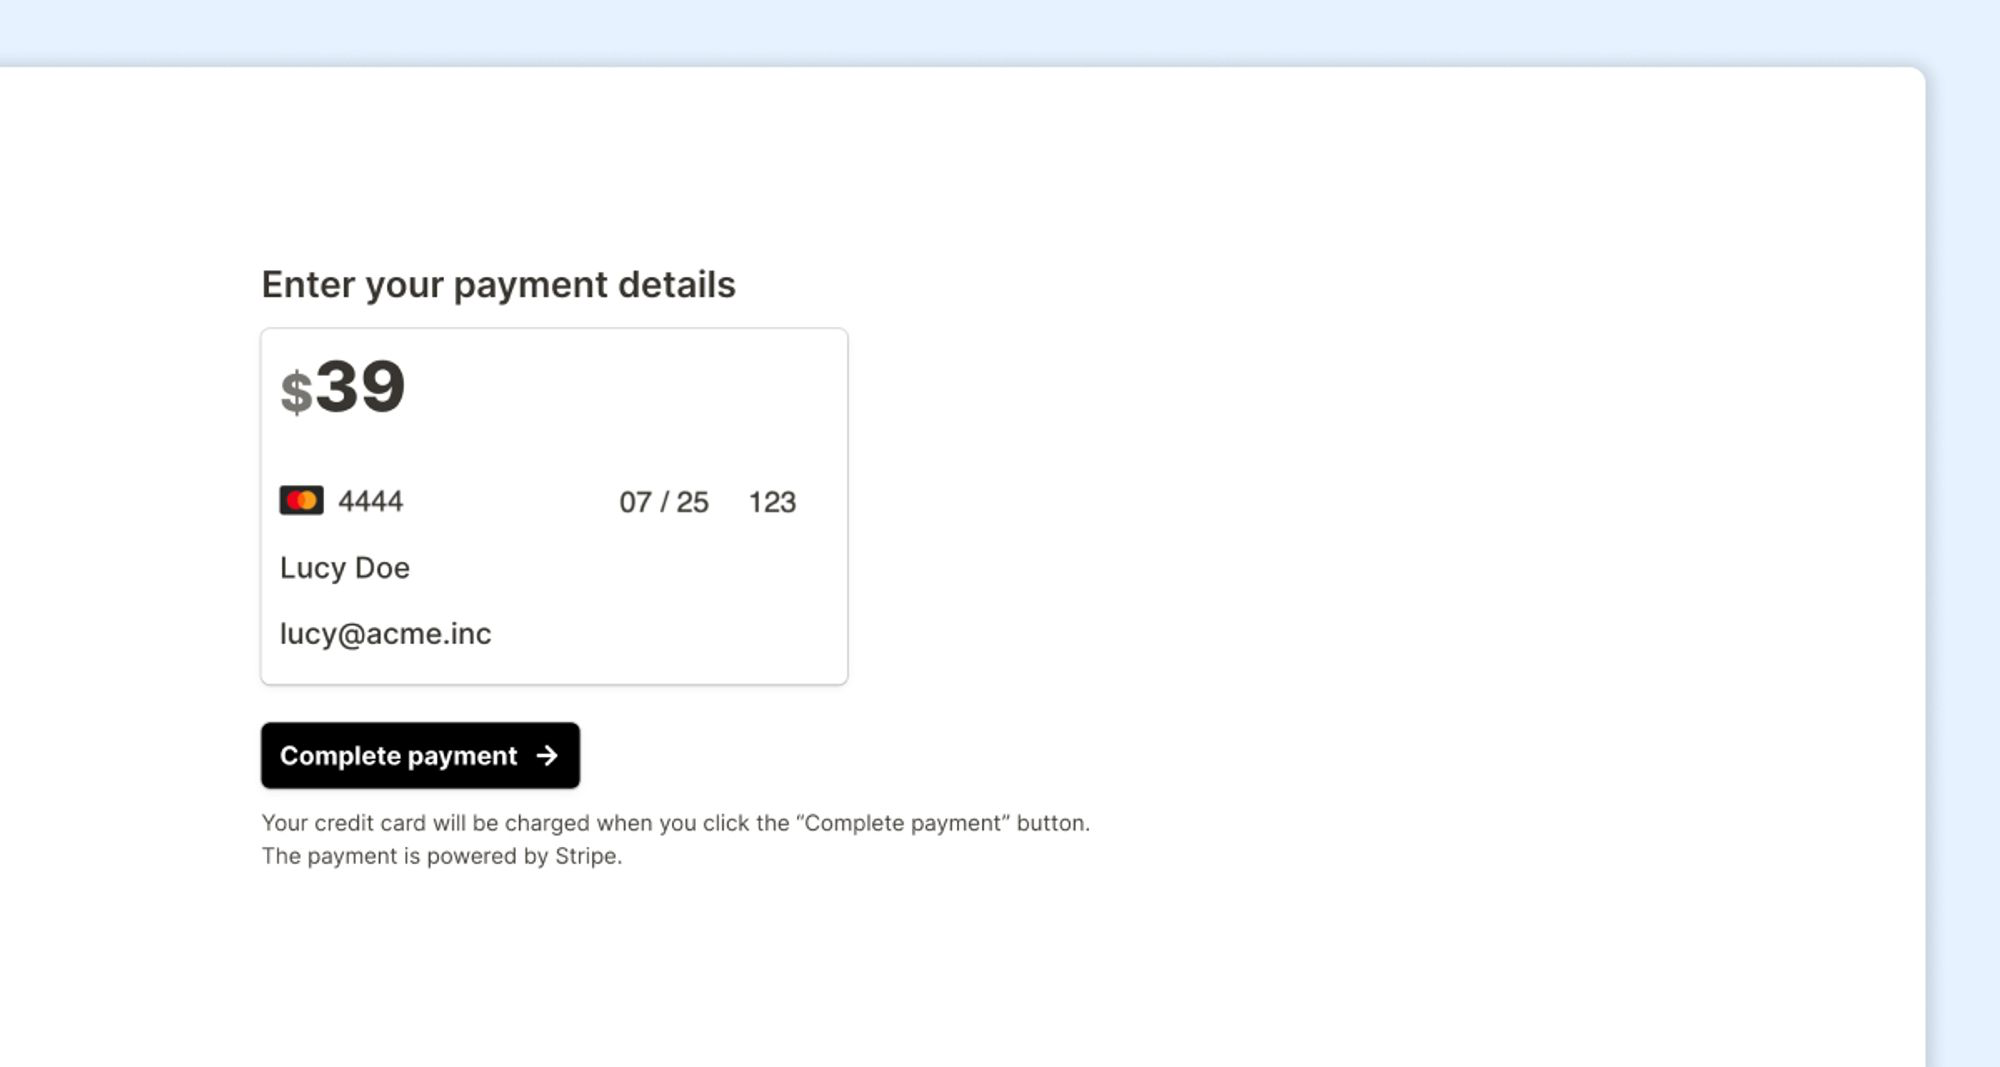
Insert a payment form
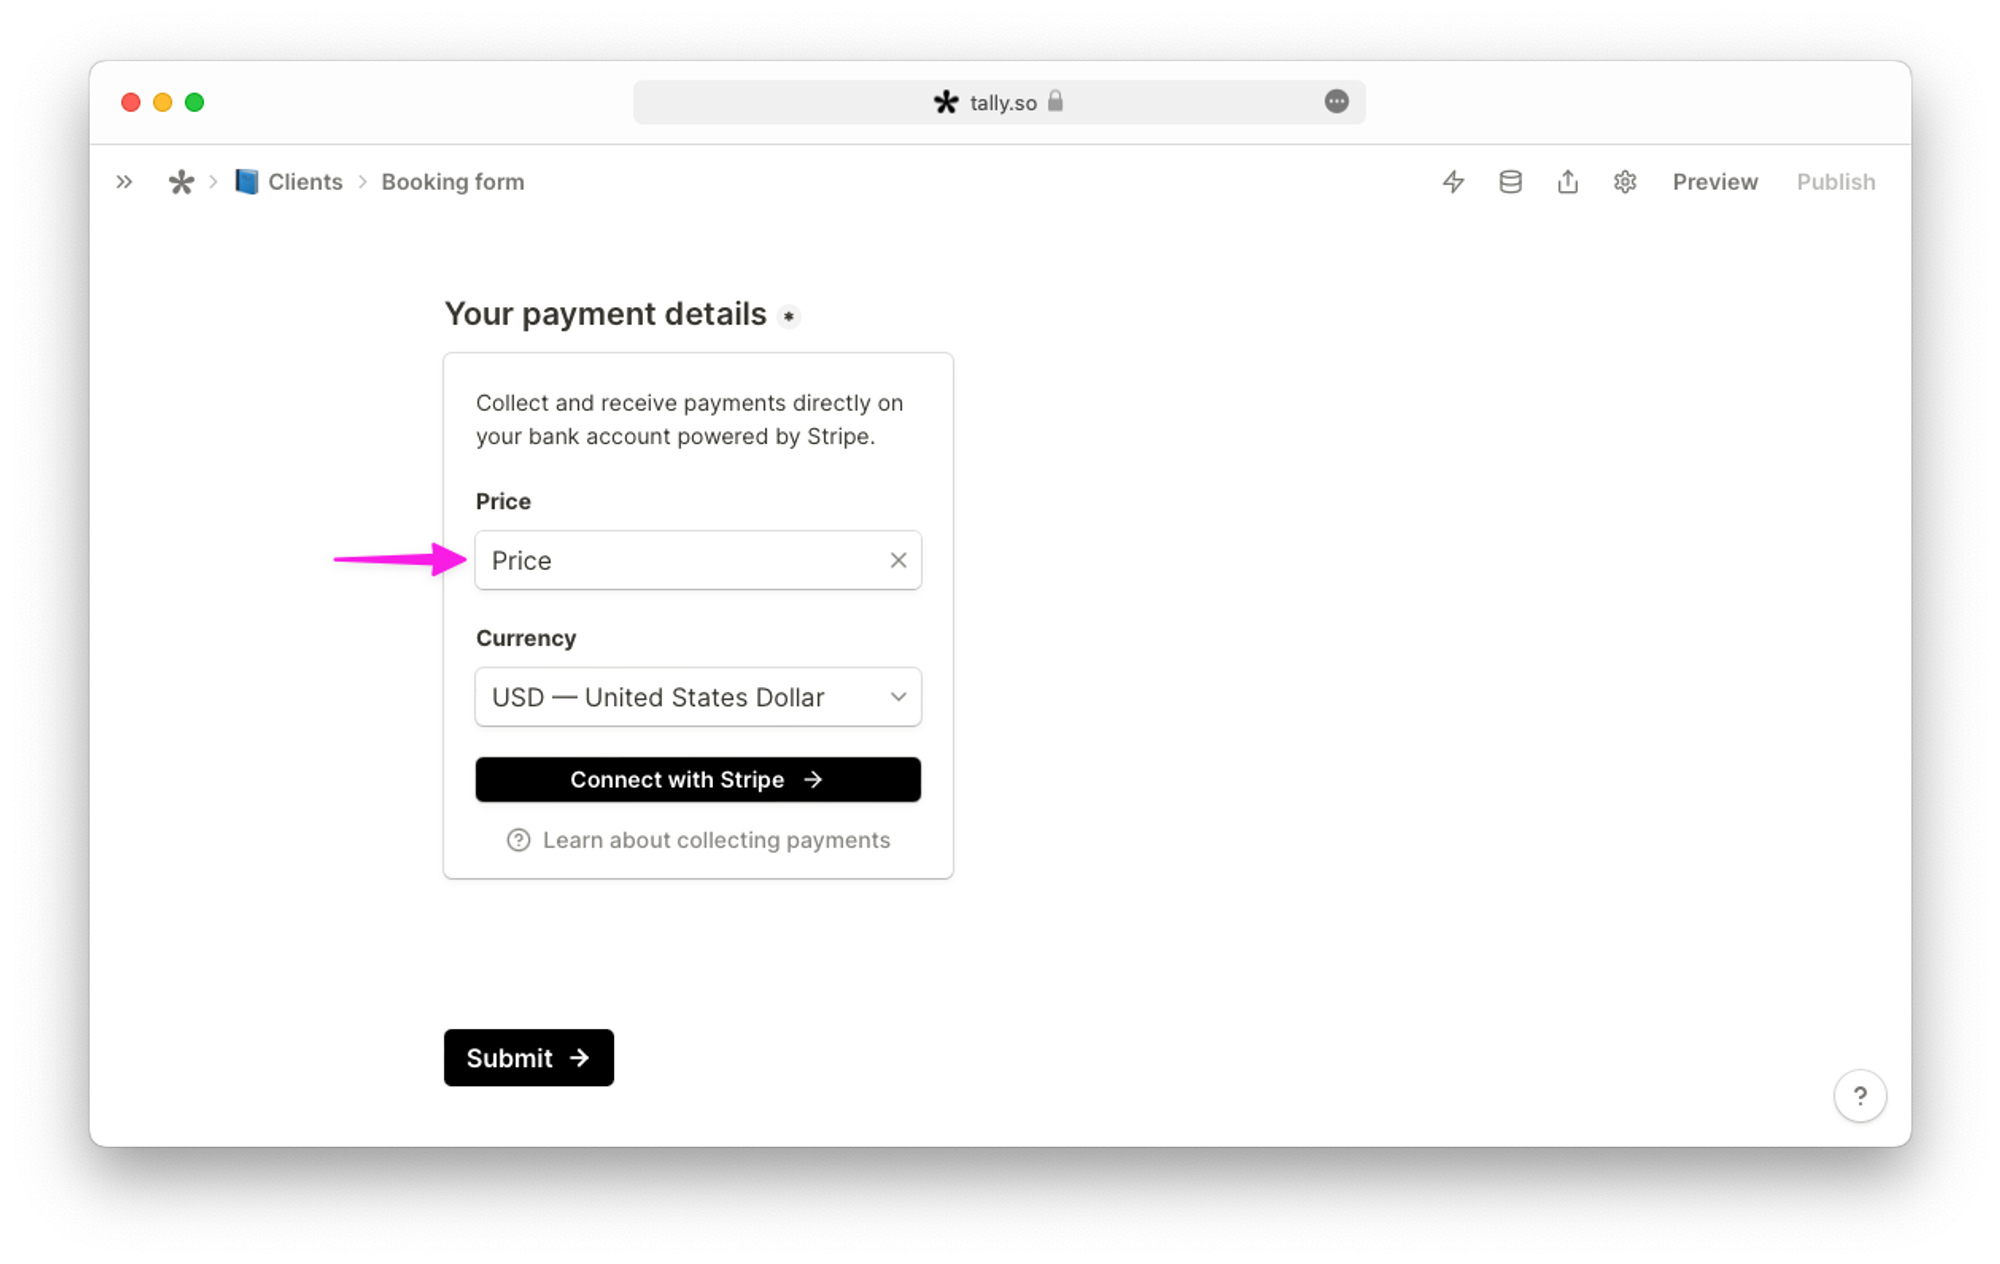
To finish your checkout flow, insert a payment block and choose the calculated field ‘Price’ from the dropdown menu. Connect to your Stripe account and you’re ready to sell!
Add a Thank you page
Add a Thank you page by typing
/thank and selecting ‘Thank’ you page. This is the final page users will see after making their purchase.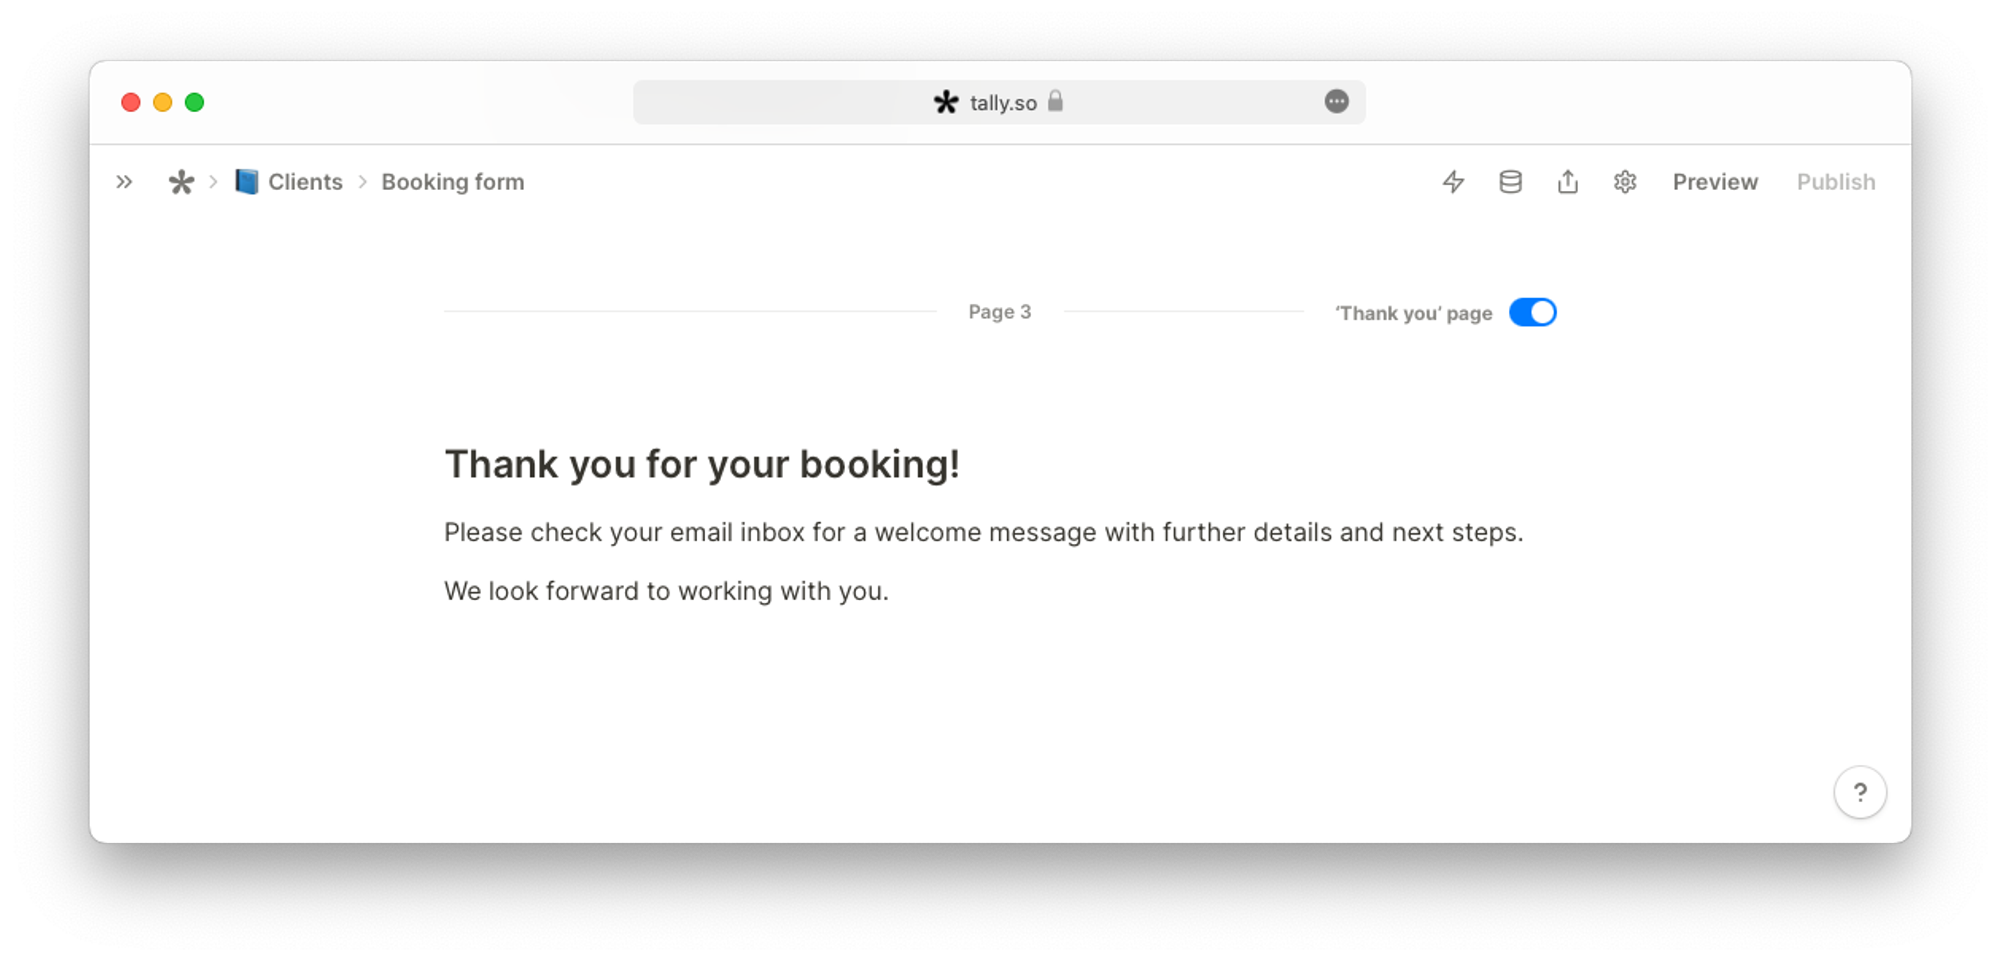
Customize your form
You can customize your form before sharing it by adding your brand colors, changing the font, inserting images, and adding other elements to make it your own.
Share or embed your checkout form
You can share the direct URL of your Tally form or embed the checkout form on your website. You can find all sharing options in the
Share tab of your published form.